

BMW E46 Headlight Lens Replacement: Body Style and Fitment Guide
11 May 2026 — Alman Parça Deposu Editorial Team
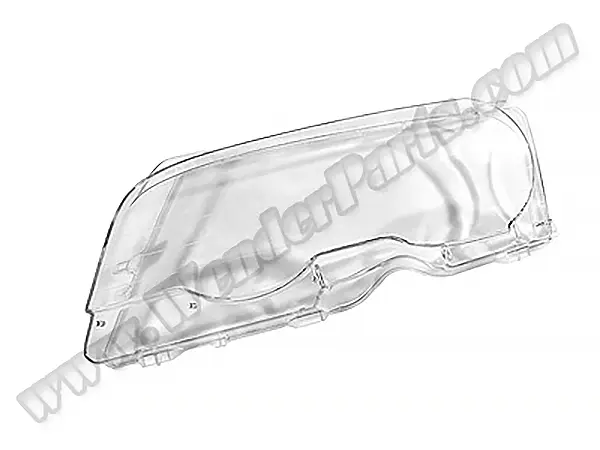
The short answer to finding the right part when replacing a BMW E46 headlight lens is this: even if the car is an E46, the body style, production period, right/left side and the distinction between the main headlight and the fog light must all be checked together. Choosing based solely on the phrase “E46 headlight lens” can lead to buying a part that looks physically similar but does not fit the housing. The safest method is to verify the vehicle record using the VIN (chassis number) and to compare the shape, mounting points and side of the part being removed with the product images.
Rather than giving definitive removal instructions to follow at home, this article is a guide to choosing the right part and planning the job safely. The construction of the headlight unit, whether it has been repaired before and the sealant used can vary from car to car. If you have any doubts about the electrical connections, headlight alignment or waterproofing, the job should be left to a workshop experienced in automotive lighting systems.
Initial checklist when choosing a BMW E46 headlight lens
Before ordering, the answers to the following five questions should be clear. If this information is not in the product name or description, it is better to ask the seller to confirm using the VIN rather than guessing.
- What is the body style? Lighting parts for Sedan, Touring, Coupe, Cabrio and Compact bodies should not be assumed to be the same.
- Which production period is it? The headlight shape and details can differ between pre-facelift and facelift (LCI) front ends.
- Which side do you need? Right and left are determined while sitting inside the car and looking forward.
- Main headlight or fog light? The two product groups are different; the word “fog” in the product name should not be overlooked.
- What is the construction of the existing unit? The mounting points, seal channel and outer contour of the lens should be compared with the existing part.
If the car's exact details are not known, you can start with the guide that explains why the VIN is requested when choosing parts. The VIN on its own does not guarantee fitment; however, it is the strongest starting point for identifying the vehicle variant.
Why do Sedan, Coupe and the production period matter?
The E46 is not a simple model family made up of a single body shape. The outer contour of the headlight works together with the bonnet, wing and indicator area. For this reason, a lens listed for the sedan should not be assumed to fit a Coupe body. Likewise, if a specific production range is stated in the product name, that range should not be ignored.
For example, APD product records include separate E46 headlight lenses for the sedan and the Coupe. The pre-facelift sedan left headlight lens, the facelift sedan left headlight lens and the Coupe left headlight lens are shown on separate product pages. This distinction shows in concrete terms why simply looking at a photo and saying “it looks close” is not enough.
| Check | Where is it verified? | Which mistake does it prevent? |
|---|---|---|
| Body style | Vehicle registration document, vehicle record and body appearance | Mixing up Sedan and Coupe parts |
| Production period | VIN and the car's production data | Mixing up pre-facelift and facelift parts |
| Right/left side | Looking forward from the driver's seat | Ordering a part for the wrong side |
| Headlight type | Product name and the position of the existing part | Buying a fog light lens instead of a main headlight lens |
| Physical shape | Comparison of mountings, seal channel and outer contour | A similar but incompatible part |
Does the headlight lens really need replacing?
Not every dull or dirty appearance calls for a lens replacement. First, you need to establish whether the problem is on the surface, inside the lens or in the sealing of the unit. Surface dirt can be removed with proper cleaning. Slight surface dullness can in some cases be improved with professional restoration. A crack, a broken mounting area, persistent internal moisture or water ingress, however, cannot be fixed simply by polishing the outer surface.
If there is a crack in the lens surface, protecting the headlight housing becomes as important as lighting performance. Moisture getting in through the opening can lead to further problems with the reflector, the bulb connection and the electrical parts. By contrast, if the lens is intact and only brief condensation is seen, the ventilation and sealing points should be inspected before rushing to order a part.
Do not confuse the main headlight lens with the fog light lens
In E46 searches, “headlight lens” and “fog light lens” results can appear in the same list. The main headlight lens is the front face of the car's primary lighting unit, whereas the fog light is a separate part in the bumper area. If the product name says “fog light”, the part is not the front lens of the main headlight. Left and right fog light products are also distinct from each other.
To compare, open the BMW E46 headlight lens search results and read the body, production range, side and headlight type terms in the product name together. Stock and price information on the search results page may change; this article therefore makes no claim about exact prices or permanent stock availability.
Safe preparation before removal
Before working on the headlight unit, the car should be on level, safe ground, the lights should be switched off and the manufacturer's procedures for the electrical system should be followed. Depending on the bulb and control unit used, there may be additional safety requirements. In particular, unqualified work must not be carried out on systems containing high-voltage ignition components.
Before starting, it is useful to take photos of the existing headlight. The external appearance, mounting points, seal line and cable routing can each be recorded separately. The edge profile and mountings of the new lens should be compared with the old part on the bench. If there is a noticeable difference, compatibility should be re-verified rather than trying to force the part into place.
Even if the job appears to be just a lens replacement, broken tabs on the headlight housing, warping or a previous improper repair can affect the result. If the housing is not sound, the new lens alone should not be expected to provide a lasting seal.
Key quality points during the replacement
The most critical issue in a headlight lens replacement is not so much separating the old part as seating the new lens on the housing properly and with a watertight seal. Old sealant and dirt can prevent the new surface from seating evenly. During cleaning, the reflector surface must not be damaged, and the housing channel must not be cut or deformed.
The sealant used must be suitable for automotive headlight applications. Using just any adhesive can create a joint that cannot be taken apart later, gives off vapour or separates with temperature changes. The material manufacturer's surface preparation and curing time must be followed. The lens should sit evenly around its entire perimeter; no attempt should be made to close a gap by pressing too hard on a single point.
If the headlight has been removed from the car, check when reconnecting it that no cables are pinched, that the ventilation channels are not blocked and that the covers are fully seated. After fitting, it is not enough for the lamp simply to light up; the dipped and main beam functions, the indicators, headlight levelling (if fitted) and instrument cluster warnings should all be checked together.
How do you check for moisture and condensation?
After the new lens has been fitted, there should be no persistent droplets or water marks inside the headlight. Slight, temporary condensation caused by weather conditions is not the same as a sealing fault; however, if the condensation lingers for a long time, turns into droplets or keeps coming back after washing, the seal line, rear covers and ventilation points should be inspected.
Attributing the problem solely to one spot, the outer joint, can be misleading. The rear bulb cover may not be fully closed, the housing may be cracked or the ventilation channel may be blocked. For this reason, after the new lens has been fitted, the source of the water ingress should be traced systematically. Spraying pressurised water directly at the joint line is not a good test method; it can strain even a sound seal.
Why should headlight alignment be checked after fitting?
When the headlight unit has been removed and refitted, the light distribution and height adjustment should be checked. Incorrect alignment can reduce the driver's visibility and dazzle oncoming drivers. A rough check by looking at a wall is no substitute for professional measurement. If the beam cut-off line has clearly changed, the light veers to the right or left, or there is play at the mounting points, a workshop check is needed.
In addition, the area around the headlight, its rear covers and its inner surface should be monitored during the first few days. If new moisture, vibration, looseness or a warning light is noticed, the installation should be reassessed before the problem gets worse.
A practical way to order the right product
- Determine the car's body style and production details from the vehicle registration document and the VIN.
- Clarify whether you need a main headlight lens or a fog light lens.
- Specify the right/left side as seen when looking forward from inside the car.
- Photograph the outer contour, seal channel and mountings of the existing part.
- Compare the body style and production range in the product name with your car.
- If you are not sure, ask for fitment confirmation with the VIN and photos before ordering.
This approach is safer than choosing a part by model name alone. The names and images on APD product pages can be used for comparison; final fitment should be assessed together with the car's exact variant and the headlight unit fitted to it.
Frequently asked questions
Will an E46 sedan headlight lens fit a Coupe?
It should not be assumed to fit. There are separate product records for Sedan and Coupe bodies. The body style, production period, side and physical mountings must all be verified together.
How are the right and left headlight lenses determined?
The side is determined while sitting in the driver's seat and looking in the car's direction of travel. On this basis, the part on the car's right is the right one and the part on its left is the left one.
Is condensation inside the headlight caused only by the lens?
No. In addition to the seal line, the rear cover, cracks in the housing and the ventilation path should also be inspected. If there are persistent droplets or recurring water ingress, simply replacing the lens without finding the source may not solve the problem.
Is it safe to replace a headlight lens at home?
Without experience, the right equipment and safety knowledge suited to the headlight type, the job should be left to a workshop. Electrical components, fragile mountings, sealing and headlight alignment all have to be dealt with together.
Is the year range on the product page enough on its own?
No. The year range is an important filter; however, the body style, right/left side, headlight type and the physical construction of the existing unit must also be checked. Confirmation with the VIN reduces the risk of choosing the wrong part.
Conclusion
The most important decision in a BMW E46 headlight lens replacement is to confirm the right product before removing the part. Once the Sedan/Coupe distinction, the pre-facelift or facelift period, the right/left side and the difference between main headlight and fog light have been verified, the risk of a wrong order is greatly reduced. During fitting, a clean surface, suitable sealing and secure mountings are required; after fitting, moisture, function and headlight alignment checks are needed. If you are not sure about compatibility, asking for support with the VIN and photos of the existing headlight is the safest step.